
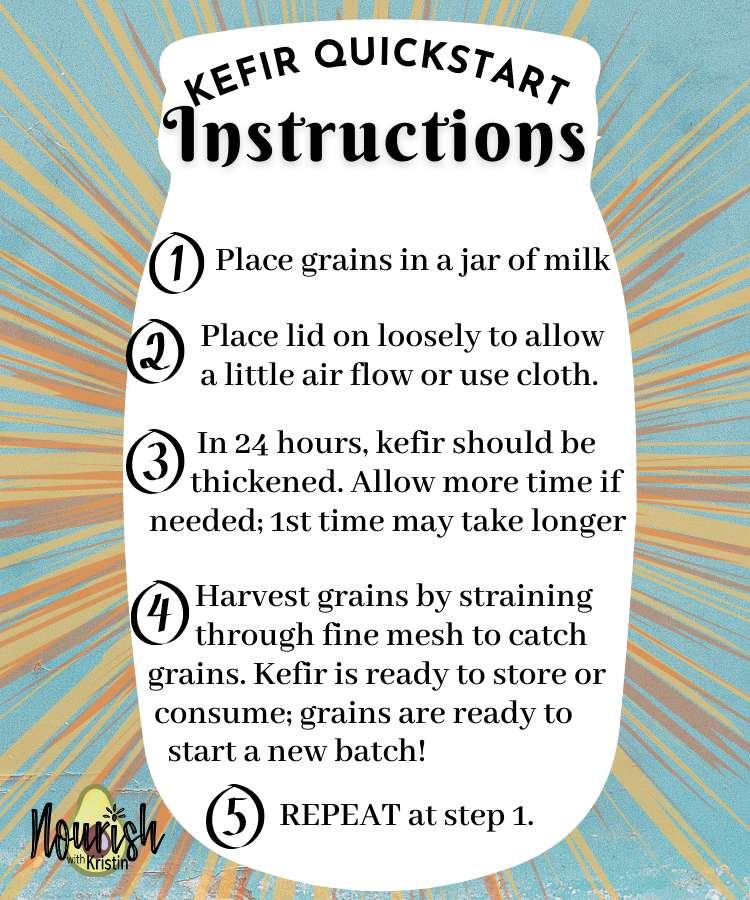
How to Make your Own Milk Kefir at Home
Welcome to my site! Whether you purchased live, active Kefir Grains from me (Via Utah Natural Meat) or wandered here off the internet, I am excited. I am a big believer in the healing power of functional foods, and Kefir is King! I have been making it in my own kitchen for over 10 years now and have tried every method and trick in the books, killed it every way possible, consumed it in every state, and consider myself a rough-road expert. If you’re in a hurry, I’ll start with my Kefir cheat sheet, but scroll below for detailed instructions, a little FAQ and some recipes!
The following instructions were written to accompany the grains I grow and sell, so I assume you have a package of them with you when you read these. If not, contact me, ask around, or search on social media for local kefir sources. I will share some online sources at the bottom of this article too.
Congratulations on your new hard working kitchen helpers….kefir grains!
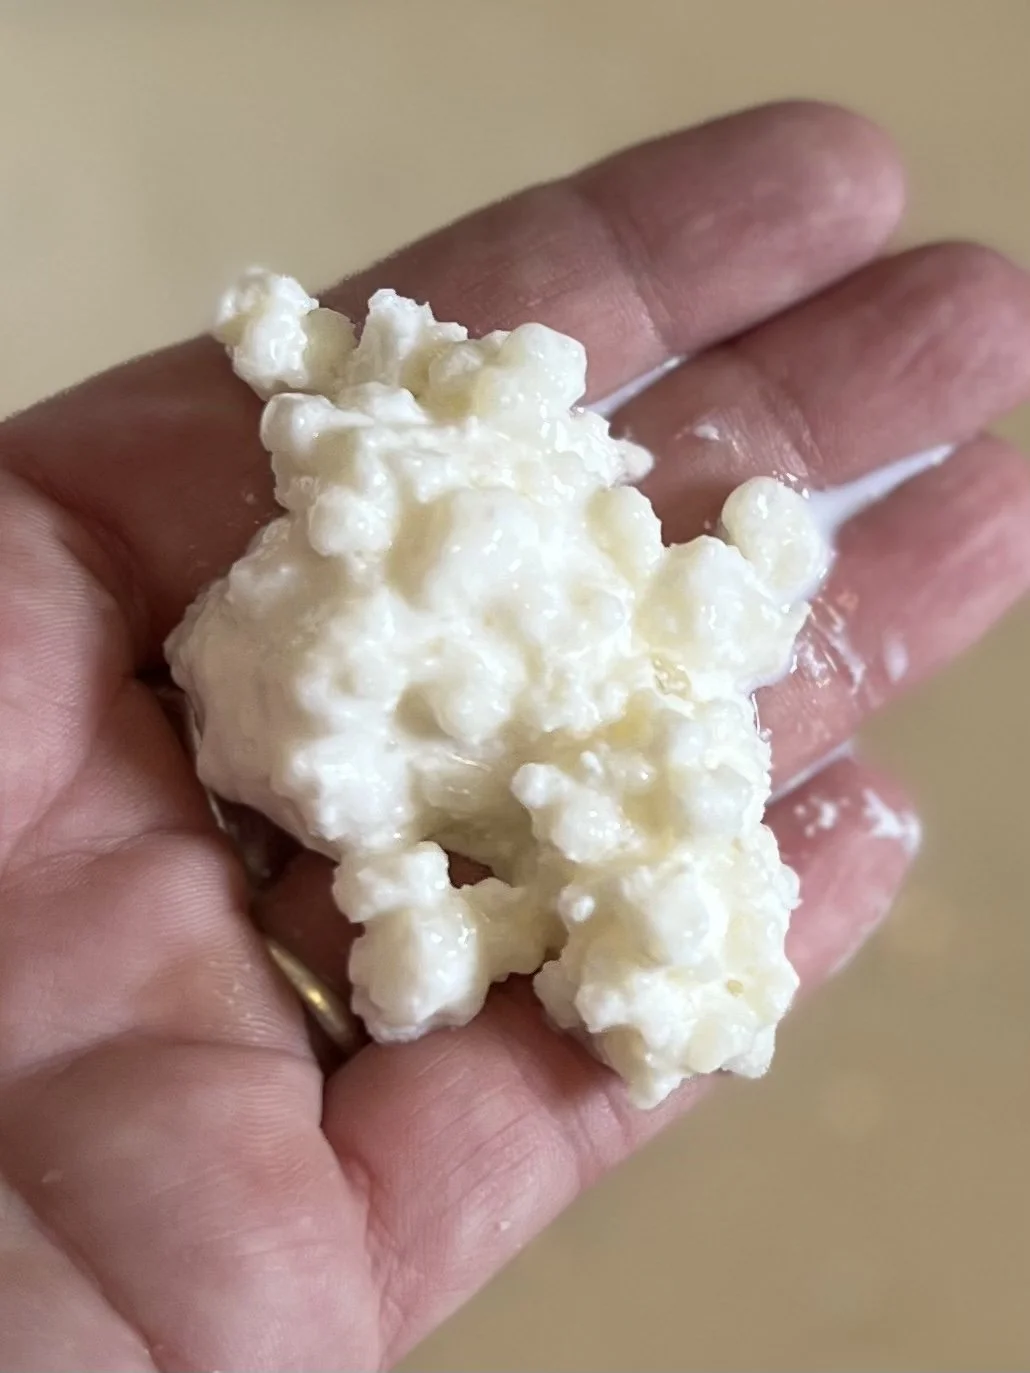
They are not actually grains, but symbiotic clusters of beneficial bacteria and yeasts that are ready to serve you. If you got them from me, these babies have been nurtured in fresh, raw milk from Utah Natural Meat and Milk, so they are ready to go! I highly suggest you look up a kefir video on YouTube so you know what to look for, but these instructions should get you going as well.
Some quick benefits of Kefir:

What exactly happens now?
Kefir generally takes 24 hours to make. So one tip to ensure your success is to start them 24 hours from when it is easiest to harvest them. For example, if you intend to make Kefir part of your morning routine, wait until tomorrow morning to start these grains. Put this little jar in your fridge and start this process tomorrow.
My starts include about 1 tablespoon of grains, enough to easily start 3-4 cups of milk. Place them in a glass jar and add of grass-fed raw milk like Utah Natural Milk (any other dairy milk is fine, but why?) Okay, any milk will do, raw or pasteurized. Organic or not. Kefir grains seem to prefer full fat milk and my struggle in skim milk, but it will still work.
How to Make Milk Kefir
Place milk and grains into a quart glass jar. If you use a bigger jar with more milk, the grains will still work, they will simply take a little longer to work through all the fresh milk.
Place a lid on the kefir and store away from direct sunlight. Out on the counter is great; in a pantry works well. Some people like the top of their fridge, but I tend to forget about it if I can’t see it.
The ideal temperature is 71º-75º F. Anything above 86°F can damage your grains. Kefir can actually still ferment anywhere from 39°F to 86°F, but staying in the ideal range insures better results.
After 24 hours*, visually inspect the kefir to see if it is done. It will look thickened, but still fluid; not like Jell-O, but thicker than water; like a thin yogurt. When you tip the jar, it should pull away from the sides. If it has not thickened, leave it alone and check on it every couple hours or so until it appears done. Taste it. It should taste tart. If it’s tart and thickened, it is done!
*If it isn’t done it 24 hours, give it more time, up to 12 more hours. The grains have been hibernating and sometimes take a little time to “wake up.” If not thickened in 36 hours, change the milk and try again.
Remove the grains. This can be done by pouring the kefir through a sieve (plastic or stainless steel) or using a slotted spoon to scoop them out.
Note that the grains hang around at the top of the jar and should be easy to scoop out with a slotted spoon.
The strained kefir is ready to use. I like to strain it right into my blender as a base for my family’s morning smoothie. If not consuming immediately, simply refrigerate.
Note that kefir can be stored in the fridge for a month and even longer, but the fermentation process (which is slowed, not stopped, by chilling) will continue and the taste will slowly become more and more sour. This is not the same as rotting or spoiling, it is just more fermented.
Place your strained grains in fresh milk and start the process over again!
Some of my beauties getting ready to bring joy and vitality to other kitchens.
Eternal Increase
Kefir grains are happy in milk. They eat, drink, and are merry. And then, they multiply. You will notice your little mass of grains increasing in size. Rate varies depending on feeding patterns and temperature, but a good rule of thumb is that they will double every 20 feedings (that’s 2 ½ weeks in daily use!) What do you do with all the extra goodness?
1. Move to a bigger container. Maybe you are ready to consume more or share with family. Swap that quart jar for 2, or even a gallon jar! And don’t worry about exact proportions. If you over feed them (too much milk for the quantities) your little grains will catch up, it might just take longer than 24 hours.
2. Share the love. Help a friend in need of probiotic goodness get his/her own kefir factory going!
3. Eat them. Yep, try it. They are like tart gummies. Really, I double dare you. How is that for a probiotic supplement?
Trouble shooting & FAQs:
Making Kefir is pretty easy once you get through your first cycle. But here are a few tips.
Help! My Kefir separated into thick stuff and clear stuff!
What you actually have is Kefir Curds and Whey! It simply over-fermented which can happen if it is warm in your kitchen, it was left out too long, or if your grains have increased and “ate” through your milk too fast. You can eat it, though it will be sour. The grains will still be good to keep working in fresh milk.
Help! My kefir still looks like plain milk!
Give them more time. Keep checking. It is either cooler than normal in the kitchen, you have too much milk for the grains, or they are inexplicably shy and need time to catch up.
Help! I need my space!
Maybe you are swimming in kefir. Maybe you are going on vacation. Never fear, there are ways to pause your kefir factory. You can simply put your grains in a jar of fresh milk and place in the fridge. They will continue to ferment, but very slowly. So they will be happy in there for awhile. I use this method for up to 2 weeks. For a longer break (it’s not you, it’s me. We just need some time apart) put them in a freezer-safe container and cover in milk. Label, and place in the freezer. This works indefinitely. My record is resurrecting 2-year-old grains! When you are ready to go again, place the chilled/frozen grains right into a new jar and cover with milk. It may take them a few days to get up to speed again, depending on how long they were hibernating (ask Hans Solo!) Just continue the process and they will catch up.
Help! I accidentally ate my kefir grains!
I don’t know anyone that has done this (certainly not me after accidentally pouring the whole jar into my smoothie blender.) Enjoy your new probiotic-fueled super powers. Use them to find yourself some more grains. Ha ha. They won’t hurt you. But I hope you have a backup in your freezer!
Help my Kefir Kefired too fast!
Did your kefir sour too quickly? When you checked on it in the morning was it already separated? This happens for 2 main reasons: either you have too many grains for your milk, or it is too warm in your kitchen. See below for the first. If its too warm, consider moving your grains somewhere cooler, like your basement or out of a sunny window.
Help! My Kefir grains are choking in cream!
Ahh, this is a problem with raw milk which means you are a lucky duck to have such a struggle! The grains float to the top and become bogged down in the cream. This can cause an uneven ferment where the top is more soured than the bottom. To solve or minimize this, try using milk that has separated already (meaning 2 days old or more) and skim the cream off the top. I use a turkey baster to do this easily with no mess. Enjoy the cream in other cooking adventures and use the separated milk to start your kefir with. Another tip is to gently swirl the jar around occasionally as you walk by to move the grains a little bit through the milk.
Help! I have too many grains!
If your grains are happy and well fed, they will multiply! In fact, if you feed them every day you can expect them to double roughly every 2 weeks! If you don’t take some out, you will quickly overcrowd your jar and your kefir will sour quickly as they hungrily devour all the sugars they feed on. You can move them to a bigger container and start making more and more kefir, but the easier thing to do is divide them. The first time you divide your grains, I suggest freezing your extras. Then if you accidentally lose your active grains, you will have backups ready to go in the freezer. Beyond that you can give them away—preach probiotics to all your friends! You can eat them or feed them to your pets. Or you can toss them, but how sad is that?
Help! Kefir makes my tummy gurgle.
Kefir is a powerful, living food. It can repopulate your gut after antibiotic use. It can fortify you from sickness. It can really shift your microbiome in favor of the good guys. But if your gut is sensitive, more is not better! Start with as little as a spoonful and give your guts time to adjust. Add a little more in a couple days and increase slowly till your desired dose.
How much should I eat?
You will get health benefits from as little as a spoonful! if you are taking small quantities, try having some 2 or 3 times throughout the day. There is no upper limit, if you tolerate it, have as much as you want. I find the flavor a little strong so I generally only put 1/4 in a smoothie and then incorporate it into salad dressings to assure I get small doses intermittently.
Can I share with my kids? My Pets?
Yes! Anyone (or any critter) that tolerates dairy will benefit from consuming kefir. With smaller tummies, start with smaller doses and work up, same as discussed above. For more info, check out this post on kefir for your pets.
Where can I find Kefir Grains if I am not near you?
My favorite place to send people is Cultured Food Life with Donna Schwenk. She is the queen of all things probiotic and a treasure trove of recipes! You can also search local groups on social media. I have met so many cool people doing that!
How do I even pronounce Kefir?
How do you say it? However you want! In America, Kee’-fur is the most common pronunciation. In the Middle East, you say Keh’-fur and still other people say Keh-feer’.
It also goes by many names including: Snow lotus, Tibetan mushroom, Kefirs, Keefir, Kephir, Kewra, Talai, Mudu Kekiya, Búlgaros, The Grains of The Prophet Mohamed, The Drink of the Prophet, Tibetan Mushrooms, Tara, Yogurt Plant, Yogurt Mushroom, Kin-oko, yogoot-tane-oko (Japanese) Tibetanischer Pilz (German), Galodium (Romanian and/or Polish) and Kefyras (Lithuanian). Whatever you call it and however you pronounce it, it is a powerful, healing food.
Where did Kefir originate?
I am glad you asked! Legend has it, the first kefir grains were a gift from Allah delivered by his prophet Mohamed. They were passed down from generation to generation and treasured within a closed society among the region now known as Turkey. Early in the 20th century, it is said the grains were smuggled out by a beautiful Russian spy who tried to charm a Caucasus prince into giving her some grains. He was wise to her ploys and had her kidnapped and detained. Upon her rescue, the prince was put on trial and she was awarded kefir grains for her damages (mission accomplished!) And so kefir grains made their first appearance in Russia in 1908.
Do I have to use Cow Milk?
The short answer: No. You can experiment! Here are some tips:
Other animal milks: Kefir Grains do best in the milk they were raised in. So if your grains were raised on whole cow milk, they prefer it. But they are able to acclimate to other milks. Want to go Goat? Simply start adding goat milk to your ferment. Start with ¾ cow to ¼ goat and then decrease the cow milk while increasing the goat milk with each ferment until you are all goat. Kefir grains can successfully ferment all forms of mammal milk. The only milk it doesn’t like is ultra-pasteurized or dry milk. It can adjust eventually but will never truly thrive.
Non-milk sources: You can use milk kefir grains to ferment nut, soy, and coconut milk, but it can be tricky, so I suggest saving some grains in the freezer so that if your experiment doesn’t work, you still have more. Store bought soy and nut milks have many additives and don’t always ferment consistently, so homemade milks are better. Add a teaspoon of sugar to your soy or nut milk to ensure the grains have enough food and ferment for 24 hours. Coconut milk doesn’t need sugar added. With all these milk substitutes, gradually adding the new milk to milk it is accustomed to (described above) will also help protect the grains. It is also a good idea to return the grains to animal milk for a ferment to help them “recharge” every 10 days or so.
Water: this is where the versatility ends. To make water kefir, a bubbly sweet soda substitute, you need to purchase water kefir grains. They are a different creature entirely and milk kefir will not work. I recommend Culturesforhealth.com for ordering and getting instructions.
Up Your Game!
When you get Kefir-ing down and become familiar with its pattern and recognizing when its done, you are ready for the next level: second-fermenting! It should be called “flavor soaking.” A second fermentation not only tastes amazing, but also increases the nutrition level of the kefir—particularly the level of b vitamins! After removing the grains, simply add the fruit and/or herbs of your choice to your kefir and allow it to sit on the counter for 1-12 more hours. The longer, the more the flavor will infuse. But be aware that the kefir will continue to sour and may even separate into curds and whey. If you prefer smooth and light, ferment on the counter for only an hour or so and then move it to the fridge to continue. Play with flavor combinations and lengths of time to see what you like best! Try lemon peel and raspberries. Or orange and nutmeg. Try strawberries and mint. The possibilities are endless!
Now you Got it, Get it in You!
Now, you have one more tool to deeply nourish and even help heal yourself and your loved ones. Your grains should be with you for years to come. Making fresh kefir for drinks, sauces, smoothies, dressings…you name it…will become a habit and even an art form. You will even find your body craves it when you skip it. Share your great flavor ideas and creations with me (#nourishwithkristin) with and feel free to reach out with any questions!
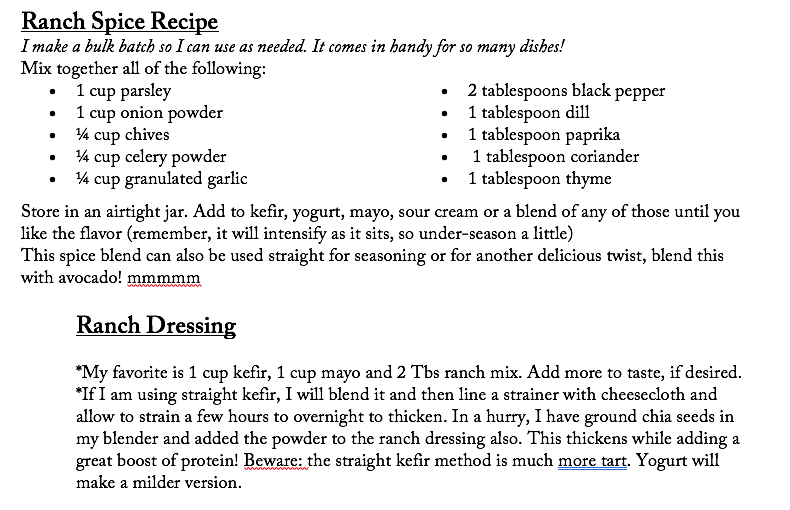
Here are some starter recipes to give you ideas:
In all of these recipes. you can use kefir and yogurt interchangeably.


Hungry for more?
Probiotics are just one part of the picture; your health is a multi-faceted, complex puzzle! Consider working with me if you want to go deeper! I share tips like this and so so much more. I use functional lab testing to find out exactly what your guts need to achieve balance. We consider hormones, digestion, adrenal health, lifestyle, toxicity, mindset and more as we work together on your fully customized journey.
A custom journey means you get to ask all your questions and we troubleshoot all your challenges together. Lab testing means we are working with your biology rather than best guesses. If you’re interested in discussing next steps, book a free call today!
